


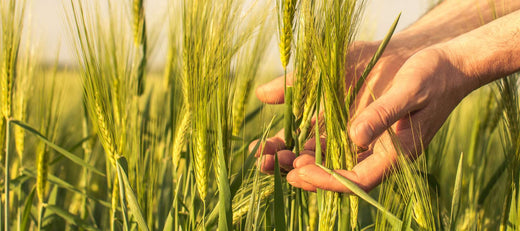
Have you ever grown wheat from seed in your home garden? It’s a growing trend in the self-reliance community. Preppers, homesteaders, and other survivalists are beginning to see the wisdom in learning the survival skills related to growing and processing wheat so that they’ll be experienced and ready for success if ever it becomes a necessity.
Growing your own wheat connects you to the very roots of agriculture and the history of civilization. Wheat has been a key food for humans for thousands of years. Because it is such an adaptable and useful crop, it is grown worldwide and is still in the top three food crops in the world and the second most-produced grain. Wheat production has had some swings in the past few years due to war, famine, and other factors, but that hasn’t stopped demand. Worldwide, wheat consumption was around 790 million tons last year.
Why Grow Wheat From Seed
Higher Food Quality
From highly refined white flour to whole grain wheat berries, most forms of wheat from the store are quite different from homegrown wheat. Most modern wheat is produced on large farms that focus on quantity over quality. Wheat grown by Big Agriculture is often subjected to high levels of pesticide use and is grown in poor soils that are amended with petroleum-based fertilizers. These agricultural practices can lead to food products that have traces of unwanted chemicals and have less nutritional value than grain grown at home.
Freshness
Store-bought wheat is generally not very fresh and has often been highly processed. While sitting in storage, nutritional value may have deteriorated over time. White flour has the wheat germ and bran removed, which does prolong shelf life but also strips the most nutrient-dense part of the wheat berry. Refined wheat products are often enriched with vitamins to replace what was lost in a more shelf-stable form, but the end product is only a shadow of its former self in terms of flavor and nutritional value.
Reliability
Growing wheat at home means you have a reliable, nutritious food source, no matter what happens. Homegrown grain can be a real asset, providing you with a healthy and dependable supply right in the backyard. You can process it fresh from your garden or store the wheat berries until you’re ready to mill flour. Growing wheat at home also means you have ready access to whole wheat berries and fresh wheat germ, two highly nutritious (and tasty) products that can be difficult to find and quite expensive.
Choosing The Right Seeds
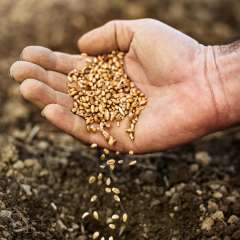
Many of the resources you’ll find on growing wheat at home will suggest that you grow from bulk wheat berries to save money. However, these are not ideal for planting because they’ve been processed very differently. You may get some germination from wheat berries, but much less than from high-quality wheat seeds. This makes sense: wheat berries are intended to be used for eating, and they need to have a long shelf life, often at room temperature. To maintain seed viability, seeds should be stored in a cool, dry place, away from direct sunlight and moisture. This preserves their quality and ensures a higher germination rate when it's time to plant them.
The viability of wheat seeds can vary, so it's vital to purchase fresh seeds from a reliable source. At Survival Garden Seeds, we do regular germination tests on all of our seeds. We also choose reliable suppliers and ensure optimal storage to encourage seed health.
Growing Wheat from Seed
Growing wheat requires patience and attention, but the process of watching your seeds sprout and grow into tall, golden stalks is incredibly fulfilling. Choose either early spring or fall for planting, as wheat thrives in cooler temperatures and requires a long growing season. Plant the wheat seeds about 1 inch deep in well-prepared soil, with plenty of room to grow. The ideal spacing of your plants is about an inch apart, in rows spaced 6 to 8 inches apart. This spacing will encourage the wheat to tiller, or produce multiple stems. Tillering produces a much better yield since each stem will produce more kernels to harvest.
Seeds typically germinate within a few days to a week after planting, depending on soil conditions and temperature. After germination, keep the soil evenly moist, especially during the early stages of growth. Don’t overwater; wheat doesn’t like soggy feet. As the wheat grows, keep an eye on your plants and be ready to act if you see any signs of pest or disease. Regular monitoring can help you address any problems early so that you can enjoy a bountiful harvest.
How Much Wheat Should I Plant?
When planning the size of your wheat plot, a broad general guide is that about 1,000 square feet of wheat can yield up to 50 pounds of grain, enough for a family's bread supply for a year. Of course, this can vary based on your soil quality, weather conditions, and other factors. Our 2-pound packet of wheat seeds is designed for the homesteader or survival gardener and contains enough seed for growing about 1000 square feet of wheat plants.
Good Companion Plants for Wheat
If you want to add companion plants to your wheat crops, consider legumes like peas or beans, which can enrich the soil by fixing nitrogen from the air into the soil for your wheat plants to use. Garlic, chives, mint, basil, and cilantro planted nearby can help repel aphids and other pests that prey on wheat. Avoid rapidly growing cover crops like mustard that would compete too aggressively with your wheat plants.
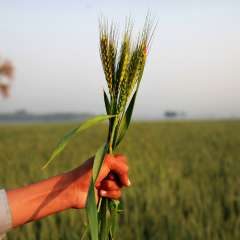
Harvesting Wheat
Harvest typically occurs in late summer or early fall, when the stalks turn golden and the kernels harden. To determine if the wheat is ready for harvest, press a kernel between your fingers; if it's hard and liquid doesn't come out, it's time to harvest. Cut the stalks near the base and bundle them to dry for a few days in a warm, dry place. This ensures the moisture content in the wheat is low enough for storage and milling.
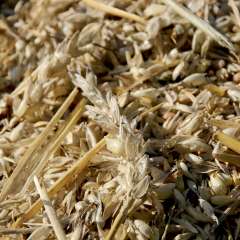
Threshing Wheat
Once the wheat is harvested and dried, the next step is threshing. This is the process of separating the wheat kernels (or wheat berries) from the chaff. This can be done manually by beating the bundles over a container. If you have access and are processing larger quantities, a threshing machine can save you some hard work. After threshing, winnowing helps to further clean the grain by removing the lighter chaff from the heavier wheat berries. This can be done by gently tossing the threshed wheat in front of a fan or by letting the wind do the work on a breezy day. The air will blow away the chaff, while the heavier kernels fall back into the container.
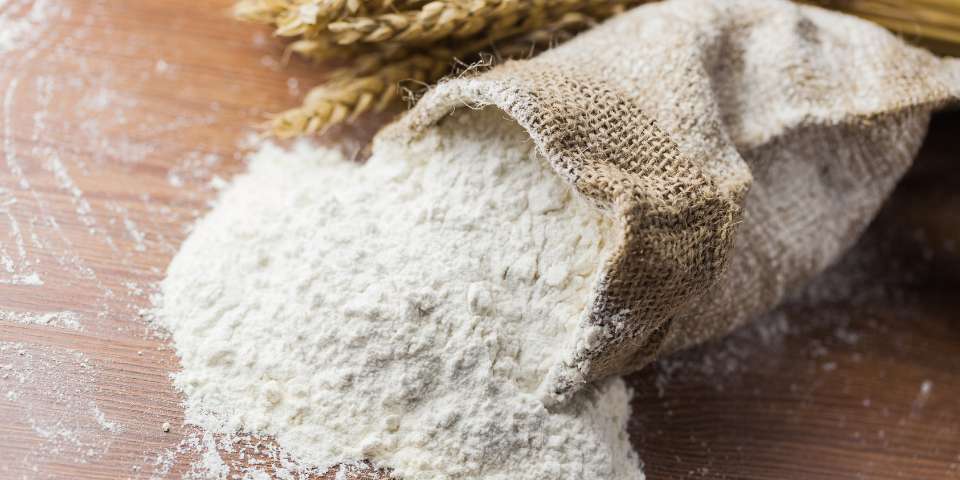
From Wheat Berries to Wheat Flour
Once you have wheat berries ready to be ground into flour, you can use a home grain mill to grind them for use for bread, pastry, or all-purpose flour. Store your freshly milled flour in an airtight container in a cool, dry place to preserve its freshness. Remember to save some of the harvested wheat seeds for next year's planting. This will ensure a continuous supply of wheat from the healthiest and most productive plants, improving your future crops for your unique growing conditions.
Survival & Self-Sufficiency
In a world where food security and natural living are becoming increasingly important, cultivating wheat from seed allows you to take control of a primary food source. You’ll reap the practical benefits of having a reliable supply of nutritious food and feel the powerful sense of satisfaction and peace of mind that comes with having such a valuable skill that can protect your family from food shortages and uncertainty.
Are you ready to grow wheat in your garden? Whether you’re a seasoned homesteader or a beginning survival gardener, you’ll learn a lot on the journey. Our wheat seeds come in the perfect size for a family garden, too.