Chives (Allium schoenoprasum) are a delightful, low maintenance herb that enhances the flavor of various dishes and adds a touch of elegance to any garden, as well as attracting pollinators with their blooms. Planting chives from seeds is a great way to enjoy this fresh herb at home. This guide will cover how to grow chives from seeds, including why you should grow them, where they grow best, the simple steps for planting, and how to keep your chives healthy.
Benefits of Growing Chives from Seeds
Growing chives from seed is a good idea for all gardeners, new or experienced. One main benefit is that buying seeds is cheaper than buying plants. Seeds cost less and can give you many more plants.
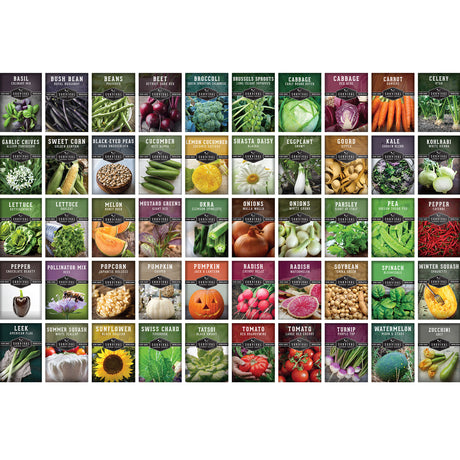
Survival Garden Seeds offers two tasty varieties of chives: common chives and garlic chives. Each has a slightly different flavor profile and appearance. Chives are perennial plants, meaning they will return year after year, providing a sustainable source of fresh herbs. In addition, chive blooms are
Ideal Growing Conditions for Chives
Chives thrive in well-drained, fertile soil with a pH level between 6.0 and 7.0. They prefer full sun but can handle partial shade, making them versatile for many garden settings.
Temperature is another critical factor. Chives grow best in cooler temperatures, ideally between 60°F and 70°F. They can withstand light frosts, which makes them good for early spring planting. However, extreme heat can hinder their growth, so it's important to monitor the temperature during the growing season.
Soil Preparation
Before planting chive seeds, proper soil preparation is vital. Start by selecting a location that receives adequate sunlight and has good drainage. If the soil is heavy clay or too sandy, consider amending it with organic matter, such as compost or well-rotted manure, to improve its structure and nutrient content.
After preparing the soil, loosen it to a depth of about 12 inches and remove any weeds or debris. Raking the soil will create a smooth surface for planting. Testing the soil pH can also be beneficial, as adjusting the pH can enhance nutrient availability for the chives.
Step-by-Step Guide to Growing Chives from Seeds
Growing chives from seeds is a straightforward process:
Step 1: Sowing the Seeds

Chive seeds can be sown directly in the garden or started indoors. If starting indoors, sow the seeds in seed trays or pots filled with seed-starting mix about 8 to 10 weeks before the last expected frost. Scatter the seeds on the surface and lightly cover them with soil, as they require light for germination.
If sowing directly in the garden, wait until the soil has warmed and the threat of frost has passed. Space the seeds about 12 inches apart, as chives can spread as they grow. Water the area gently to keep the soil moist but not waterlogged.
Step 2: Germination and Seedling Care
Chive seeds typically germinate within 7 to 14 days, depending on the temperature and moisture levels. During this time, it is crucial to keep the soil consistently moist. Once the seedlings emerge, thin them to ensure adequate spacing, leaving the strongest plants to grow.
For indoor seedlings, provide ample light by placing them near a sunny window or using grow lights. If the seedlings become leggy, it may indicate insufficient light, and they should be moved to a brighter location.
Step 3: Transplanting Seedlings
Once the seedlings have developed a few sets of true leaves and are about 4 to 6 inches tall, they can be transplanted outdoors. Harden off the seedlings by gradually exposing them to outdoor conditions over a week. This process helps them acclimate to their new environment and reduces transplant shock.
When transplanting, dig holes in the prepared garden bed and gently place the seedlings, ensuring the root ball is level with the soil surface. Water the newly transplanted chives thoroughly to help them settle in.
Indoor Growing
Growing chives indoors in pots is an excellent option for year-round harvesting, especially in colder climates. Choose a pot that is at least 6 inches deep and has drainage holes, filling it with a quality potting mix. Place the pot near your brightest window—ideally a south-facing one—as chives still require plenty of light, or supplement with a grow light for 14-16 hours daily. Maintain consistent moisture in the soil, and ensure the room temperature stays between 60°F and 70°F. Sowing seeds directly into the pot and thinning the strongest seedlings will establish a healthy indoor plant that will provide fresh herbs right on your kitchen counter.
Maintaining a Healthy Chive Garden

Once established, chives require minimal maintenance, making them an excellent choice for busy gardeners. However, there are several key practices to follow to ensure a healthy and productive chive garden.
Watering
Chives prefer consistently moist soil, especially during dry spells. Water them regularly, particularly during the growing season, but avoid overwatering, as this can lead to root rot. A good rule of thumb is to water when the top inch of soil feels dry to the touch.
Fertilizing
Chives benefit from occasional fertilization to promote healthy growth. A balanced, slow-release fertilizer can be applied in early spring as new growth begins. Alternatively, organic options such as compost or fish emulsion can provide the necessary nutrients without the risk of over-fertilization.
Pest and Disease Management
Chives are relatively pest-resistant, but sometimes aphids or onion flies can be a problem. Check your plants often for pests and treat them if you see any. You can use insecticidal soap or neem oil to get rid of them.
Diseases like downy mildew or root rot happen if you water too much or if the soil doesn't drain well. Make sure you plant your chives far enough apart so air can move between them to help prevent these problems.
Harvesting and Using Chives
You can start picking chives once they are about 6 inches tall. Cut the leaves off near the bottom; this lets the plant keep growing. Picking them often helps the plant grow fuller and stops them from making flowers, which can change how they taste.
Culinary Uses
Chives are a super flexible herb that can make almost any meal better. That mild oniony flavor is perfect for jazzing up salads, soups, omelets, and even a plain baked potato. Plus, you can sprinkle them on top of dishes for a little extra color and zing.
Preserving Chives
To preserve chives for later use, consider freezing them. Simply chop the chives and place them in an ice cube tray filled with water. Once frozen, transfer the cubes to a freezer bag for easy use in cooking. Dried chives can also be made by hanging the stems upside down in a cool, dark place until fully dried.
Grow Your Own Chives from Seed
Don't let growing chives from seed intimidate you! It's satisfying and easy, plus it saves you money. Nail the right growing spots, follow a few simple steps, and keep up with some basic garden care, and you'll be snipping fresh chives right outside your door. They're a fantastic, fresh-tasting addition to any meal, whether you're cooking with them or just sprinkling them on top.

