Can you imagine autumn without pumpkins? Fall wouldn’t be complete without these vibrant beauties. For some, a trip to the pumpkin patch is enough to satisfy their yearly pumpkin craving. But if you are a serious pumpkin lover like me, growing your own is the way to go. If you’re just now thinking about planting as summer cools off, you’ve missed the window for this year’s Halloween or Thanksgiving harvest. But don’t worry—fall is the perfect time to tap into that excitement to start planning for next year’s garden. As you carve Jack O’Lanterns, sip pumpkin spice lattes, and explore new recipes, let your love of pumpkins inspire you to get ahead. A little timing know-how can set you up for a spectacular display next fall. Get your pumpkin seeds for planting ready now so you can grow your own next year.
How Much Time Do Pumpkins Take to Grow?
If you want pumpkins in time for fall, remember that pumpkins take anywhere from 85-120 days on average to develop. Allow around 7-14 days for germination before you consider days to harvest. Miniature pumpkins and small pumpkin varieties mature the fastest, around 85-90 days under ideal conditions. Larger pumpkins may take 120 days. If you are growing a pumpkin for size, add even more time: 130-140 days is a good estimate for a huge, prize-winning Atlantic Giant pumpkin. Planting is highly dependent on growing conditions, so you want to give yourself some wiggle room for your plants to take a little longer to grow or other variables that may arise.
Calculating Pumpkin Planting Time
Now that you have a general idea about how long it will take to grow your pumpkins, you can decide on the ideal window planting for your growing conditions. What do you want to use your pumpkins for? Do you want them in time for Halloween or Thanksgiving? Are you primarily using them for cooking? Do you care about long-term storage? All of these factors may affect your timing. It takes about two weeks to cure pumpkins, which will keep them in good shape for long-term storage or ornamental use, so work in another 14 days if that’s part of your plan.
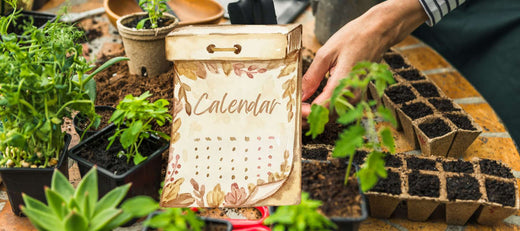
Keep in mind that pumpkins are sensitive to cold and should not be directly sown outside until soil temperatures are consistently 70°F and all danger of frost has passed. In seasons with late frosts in spring and early frosts in fall, the window for growing can be even shorter. If necessary, your pumpkins can be started indoors and transplanted outdoors once the soil has warmed up. When you transplant, be careful not to disturb the delicate roots. Our Planting Calendar tool can help you figure out the perfect timing.
How to Grow Pumpkins
Pumpkins are surprisingly easy to grow once you get them in the right spot. They do need plenty of sun, space, food, and water to thrive, so let’s get you on the path to success.
Choosing the Perfect Spot
Full Sunlight: Pumpkins thrive in full sun, needing at least 6-8 hours of direct sunlight per day. Choose a sunny spot in your garden to give your pumpkins the energy they need to grow big and healthy.
Rich, Well-Drained Soil: Well-draining soil is essential. Pumpkins are heavy feeders, so enrich the soil with compost or organic matter before planting to boost nutrients and add more as needed through the growing season. Aim for a slightly acidic to neutral pH (6.0-7.0) for the best results.
Planting Techniques

Planting in Mounds: Creating small hills about 2 feet wide, or “mound planting,” is a popular planting technique for pumpkins because it helps warm the soil faster in spring, encouraging quick germination and better drainage. Mounds also make it easier to spot pests early on.
Rows or Containers: Some gardeners prefer rows, which can be easier to water and maintain, especially if they are growing a lot of pumpkins. Pumpkins can also be grown in large containers or raised beds with at least 20-25 gallons of soil for good root development. Keep in mind that the vines will still need space to spread out.
Watering Tips
Deep, Consistent Moisture: Pumpkins need a lot of moisture to set fruit, so aim for about 1 inch of water per week. Water deeply to encourage strong root growth, but avoid watering the leaves to reduce the risk of powdery mildew.
Mulching: A layer of mulch helps keep the soil moist and cool, reduces weeds, and prevents soil-borne diseases from splashing onto the plants. Organic mulches like straw, shredded leaves, or grass clippings work well.
Managing Pumpkin Vines
Training the Vines: If space is tight, you can train the vines in a specific direction or provide strong support for smaller varieties to save garden space. Keep an eye on the direction of the vines and adjust as needed.
Pruning: Pruning secondary vines (those that branch off the main vine) can help focus the plant’s energy on growing larger pumpkins. Be cautious and prune sparingly to avoid stressing the plant. If you’re growing for size, you can also prune all extra fruits but one or two per vine to allow the plant to focus all its energy on one enormous pumpkin.
Pumpkin Pollination

Squash bees, honeybees, and bumblebees usually pollinate pumpkin flowers, allowing fruit to form. Plant showy flowers near your pumpkins to attract these helpers to your garden, because they will do all the hard work for you. However, if you have difficulty attracting pollinators, are growing in a greenhouse, or your indoor seedlings begin to flower before you’ve set them outdoors, you can also hand pollinate. Male flowers have stems covered with fuzzy pollen. You can collect this pollen with a small paintbrush and carefully brush it all over the female flower's pistil. After this, close the female flower by covering the pistil and pressing the petals closed to keep the pollen sealed inside.
Harvesting Pumpkins
Don’t be tempted to rush harvesting: pumpkins need to stay on the vine until they reach their peak for the best flavor, size, and storage potential. You’ll know it’s nearing harvest time as color development becomes richer, the outer rind becomes harder, and the stem starts to dry out and become shriveled. The stem should be sturdy and starting to crack. If it’s still green and pliable, it’s not ready yet. Harvest with sharp pruners or a knife, leaving 3-4 inches of stem attached. This stem helps prevent rot during storage and gives you a “handle” to hold onto. Be gentle; bruising a pumpkin shortens its shelf life.
Curing & Storage
Pumpkins make excellent survival food. Pumpkin flesh is easy to puree for canning, and it’s also simple to roast whole pumpkins and freeze the chunks. Our choice for long-term storage is curing, which only takes about 7-14 days. This way, you won’t have to process a large number of pumpkins at once, plus you’ll save valuable pantry and freezer space. When properly cured, pumpkins can last until spring, giving you months of healthy food stores and lovely seasonal decor. To learn more, head over to our article on How to Cure and Store Winter Squash.
If you’ve got pumpkin fever right now, we get it. It might be too late to plant this year, but that enthusiasm makes this the perfect time to start planning next year’s pumpkin patch. Find the right spot in your garden and enrich the soil now. Enjoy this year’s Jack O’Lanterns and pies to the fullest, knowing next fall will be even sweeter when your own homegrown pumpkins are part of the tradition. As you savor your favorites, pay attention to what varieties you love most so you can choose the perfect seeds for a bountiful harvest next year.

