


We’ve previously discussed some composting methods, including traditional composting in a bin or pile and Bokashi composting with a specially designed bucket. Today we’d like to discuss another popular composting method, worm composting, also known as vermiculture or vermicomposting.
Vermicomposting produces odor-free, nutrient-rich compost that is highly prized by gardeners. Worm compost can be used as an amendment directly to your garden soil, or used to make a compost “tea” that allows you to spread those nutrients to your plants as you water.
There are several different methods of vermiculture, but they all share a few common ingredients.
What You Need
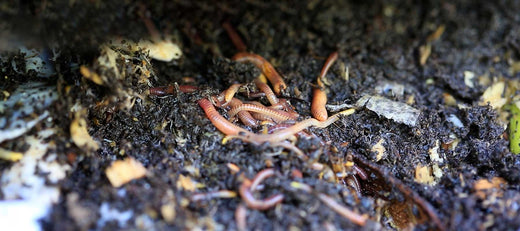
- Worms are the most essential piece of the equation, and not just any worms will do. The most popular composting worms are “Red Wigglers” (Eisenia fetida). You may find them at a local bait shop; if not, they are easily ordered online by the pound. You will want about 1 pound of worms per composting bin.
- You will need bedding, also called “browns” in composting parlance. This can be shredded cardboard, shredded paper, dry leaves, straw, mulch, or wood chips.
- Of course, the worms will need food or “greens”. Worms are a little more sensitive than your typical compost pile, so their food should consist of fruit scraps, vegetable scraps, small amounts of bread or pasta, coffee grounds, and crushed eggshells. Due to its high acid content, try not to add too much citrus as food - no more than 1/5 of the greens you add.
- Some garden soil to get things started.
Vermicomposting Options

There are a couple of different ways to compost with worms. It can be done within a container, inside your garden, or raised bed. With a self-contained worm bin, you can keep it either outside or inside and move the bin as needed to maintain proper temperature. Another method of vermicomposting that has gained popularity is in-garden worm composting. With the compost bin sunk right into the garden soil, it allows the worms the freedom to move within your garden to where the temperature best suits them, you also get the added benefit of the worms aerating the soil and spreading nutrients as they move.
Stand-Alone Bin
To prepare a stand-alone bin, you will need to start with some bedding and make sure it is evenly moist, but not too wet. The bedding should be about the moisture level of a wrung-out wet sponge. Then you can add your worms along with some garden soil. The garden soil will help the worms by introducing some microorganisms that the worms use to digest their food.
Top off your worms with a layer of greens (food) and then another layer of browns. This should be the process every time you feed your worms. Layer in the greens and then a layer of browns and then cover the bin. Keep your worm environment evenly moist.
Worms don’t have teeth, so it helps them to feed faster if you make their food as small as possible, by chopping it into small pieces or even running it quickly through a food processor if you’re in a hurry for worm castings. If you find the worms are leaving a lot of waste food, try reducing the size of the food pieces or slow down feeding until they catch up. You can expect one pound of worms to eat about three pounds of food waste per week (about half their body weight per day).
You don’t want to overfeed your worms. You can try to keep track of how much you feed by burying the food in a different part of the bin each time you feed. Pay attention to what your worms are eating and remove any large pieces of uneaten food. When you first get them, the worms might eat slowly until they become acclimated to their new home, so feed lightly at the beginning.
In-Bed or In-Garden Bin

There are many different types of in-garden vermicomposting bins, but they tend to share similar features, particularly openings in the sides and/or bottom of the bins that allow the worms to move in and out of the bin to feed or retreat to a soil environment that is most comfortable for them.
To start an in-garden worm environment, dig a hole into your garden or raised bed that accommodates the worm bin. Use the same process mentioned above to add bedding and food, then cover to protect the worms and the bin. In-garden vermicomposter feeding is also the same. The primary difference is that your wriggling employees will seem to disappear from your composting bin. Not to worry, they have just moved deeper into the soil and will return when you feed them. This benefits your garden in that they aerate the soil and carry nutrients with them.
Troubleshooting Tips
If you notice your composting bin is starting to stink, you may be overfeeding. Dig through the bin and remove any large pieces of food waste that appear to be rotting. Food waste can also add a lot of moisture to your bin, so add some more bedding if it’s gotten too wet.

If your worms are wriggling out of your standalone bin, you may not be providing the right environment for them. Happy worms should stay in their bin. If the bin is too dry, add some water. If it’s too moist, mix in some bedding to help absorb excess moisture. Also, check for insect larvae or other pests within the bedding. If the environment has gotten too out of control it’s best to clean out the bin and start fresh with new bedding and food.
Provided with the right environment, your worms will reproduce and die off in a natural cycle and you shouldn’t have to add more worms. If you have a standalone vermicompost bin that you keep outside, you may need to bring it indoors during the cold winter months. In-garden bins are a little more resilient because the worms can move deeper underground to keep warm.
Reaping the Benefits
There are a couple of methods for harvesting worm-casting gold: the lure method and the dump method.
The lure method involves moving the food around in the bin to attract the worms and then harvesting the castings from the area they left behind. To do this in an in-ground or standalone bin, simply feed the worms on one side of the bin for a couple of weeks. That will attract them to that area of the bin and allow you to scoop out the castings from the other side.
The dump method requires that you dump your whole bin upside down on a tarp in the sunshine or under a bright light. Your worms will rush to the bottom of the pile, away from the light and toward their food. Then you can scoop off the castings from what is now the top of the pile. This is also a great opportunity to rinse out your composting bin and start fresh with clean bedding.
Using Worm Compost
Worm compost can be used like any high-nutrient fertilizer by spreading on the surface of the soil or mixing in around plants. Because of the high concentration of nutrients in vermicompost, you should be careful using it around delicate young plants because it can cause burning.
Some vermicompost bins are designed with a drain and spigot that will allow you to harvest worm tea or leachate. Leachate should be diluted 1 part leachate to 6-10 parts water. Worm tea can serve as a replacement for chemical fertilizer and works as an inoculant for potting soil to bring beneficial microorganisms.
If you are interested in a deep dive into using worm compost and worm tea, you should check out the research from Cornell University.
Nature’s Magic
Vermicomposting is an all-natural way to create one of nature’s best fertilizers for your garden. It also contributes to a healthy environment by introducing healthy microbes into your soil and allowing you to have less food waste that would otherwise go to a landfill. Just like Bokashi composting, it is odor-free and requires little space. Because you are taking care of living creatures, it involves a little bit more effort and diligence to make sure the worms always have an optimal environment. In the end, the effort will reward you with a very healthy garden.